Xerox
Download Printer Driver for Windows and Mac Devices
Download Printer Driver
Recommended For Most Users
2.0.1 | 2.0.1 | Stable Version
Latest Features
2.0.1 | 2.0.1 | Stable Version
For information about supported releases, Click Here.
Why Is My Xerox B225 Wireless Printer Not Working? (Full Guide)
By Phillips
How to Setup Xerox B305 Wireless Printer on Computer? (Easy Guide)
By Phillips
How to Resolve Xerox B235 Wireless Printer Offline Error? (Easy Steps)
By Phillips
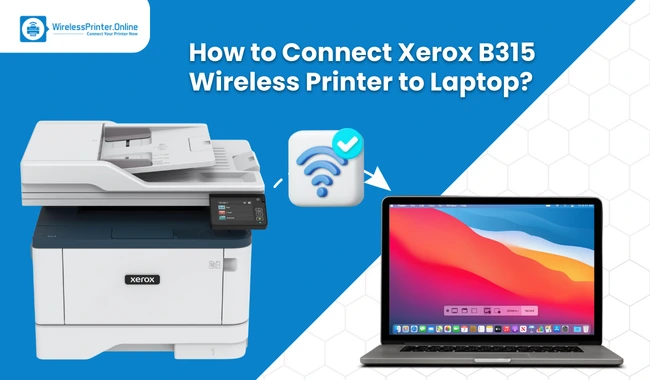
Connect Xerox Wireless Printer On Windows And Mac
Xerox offers a full range of wireless printers like Wi-Fi-ready inkjet, laser, and duplex printers with high speed. In addition, it provides Wireless printers for cable-free printing. These printers are convenient for users to print from multiple devices. No pesky hard wires or cables are required to connect these printers to a Wi-Fi network or Windows and Mac. Just keep the Printer at a convenient place, ensuring a strong signal between the Printer and wireless router.
Xerox Wireless Printer is easy to use on any Personal Computer or Mac device. This guide will help you know how to add your Printer wirelessly and then use it on Windows and Mac to print photos and documents appropriately.
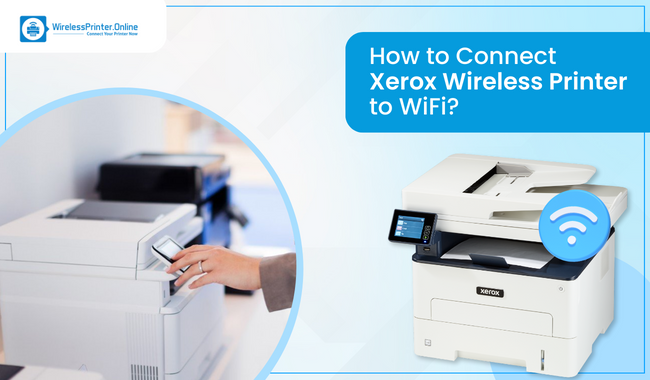
How to Connect Xerox Wireless Printer to a Wireless Network
Before connecting the Printer to a wireless network, a wireless router must be configured with an SSID and essential credentials. Two steps are involved in the whole process. First, install the Wireless Network Adapter and connect to the Wireless Network.
-
Installing the Wireless Network Adapter
An optional wireless network adapter plugs into the back of the control board. Once the adapter is installed and enabled and configured wireless networking, the cable will connect to the wireless network successfully.
-
Power off your Printer first.
-
Go to the Control Panel and click the Power/Wake button. Click on Power Off here.
-
Open the front door of your Printer and click on the main power switch to make it OFF.
-
Please navigate to the Wireless Network Adapter and remove its packaging.
-
Follow the instructions given to install the Wireless Network Adapter properly.
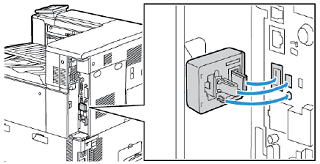
Note: When the adapter gets installed, remove it only when required. Also, follow the instructions carefully for Wireless Network Adapter removal.
-
Connecting to Wireless Network [Manually]
Configure your Xerox Wireless Printer and then manually add it to a wireless network from the Control Panel of your Printer. Let’s discuss the method step by step.
-
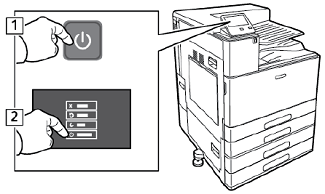
Move to the control panel of your Printer and log in as a system administrator.
-
Click on the login button.
-
Next, you can touch or type admin.
-
Enter the administrator password and then hit OK.
-
-
Click on the Home button.
-
Next, go to Device - Connectivity and then Wi-Fi.
-
Is Wi-Fi Off? Go through these steps
-
Click on the Wi-Fi toggle button to bring it On from Off.
-
Activate Wi-Fi settings by pressing the Home button.
-
When the Restart Now prompt appears, click on it.
-
Click Device - Connectivity and then Wi-Fi once your printer restarts.
-
-
Now, connect it to a Network. Below are the steps to execute.
-
Initiate by clicking on the name of your Network.
-
Type in the password for Network you have selected. Click OK, then.
-
And if the Network fails to appear, click Manual Setup, and don’t forget to configure settings for the Wireless Network. Type the SSID of your Network SSID and hit Ok. Select the security method when you click Security and enter your wireless network password. Click OK at the end.
-
-
Navigate to the Home button and activate your Wi-Fi settings changes.
-
Touch the prompt Restart Now.
-
Wait for two minutes after the printer restarts. And then collect network information with IP address and print a Configuration Report.
How to Add a Xerox Wireless Printer to Windows
To connect your Printer to Windows, you can use Xerox global print driver. It helps the Printer in getting updated without interrupting the drivers. Multifunctional printing is also manageable at ease. You can connect your Printer to Windows while using this driver software.
-
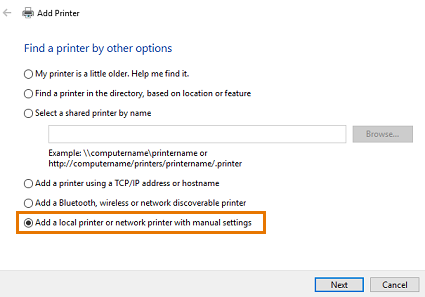
Initially, go to the Start menu and then Settings - Printers & Scanner - Add a Printer - Add a local printer.
-
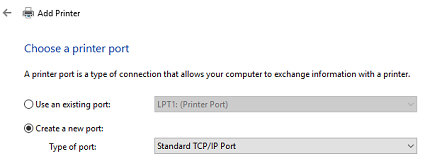
Click Create a new port on the new Window and choose Standard TCP/IP Port.
-
Now, enter the IP address on a text box, click - Query the Printer, and select the driver to use automatically.
-
On the pop-up Window, you will find that Windows is trying to communicate with the Printer and detecting automatically for the printer driver to use.
-
Next, hit the Next button and select Xerox Global Print Driver PS - Use the current driver installed.
-
Type in your Printer’s name on the Textbox, and the installation process will begin.
-
Next, when the Window appears, click Do not share this Printer and then hit Next.
-
Later, click Print a text page when the verification regarding successful connection displays.
How to Add a Xerox Wireless Printer to Mac
When you connect the Printer to a Mac device, first, you must ensure that the Printer and your Mac computer are connected to the same wireless Network. Later, follow the instructions outlined below.
-
Update your Mac to make sure that your Mac now has all the latest information related to the Printer. Open the App Store, hit the Updated tab, and then Update All.
-
Click on the Apple menu, which is in the upper-right corner of the screen.
-
Navigate to System Preferences which you can see near the top of the Apple menu.
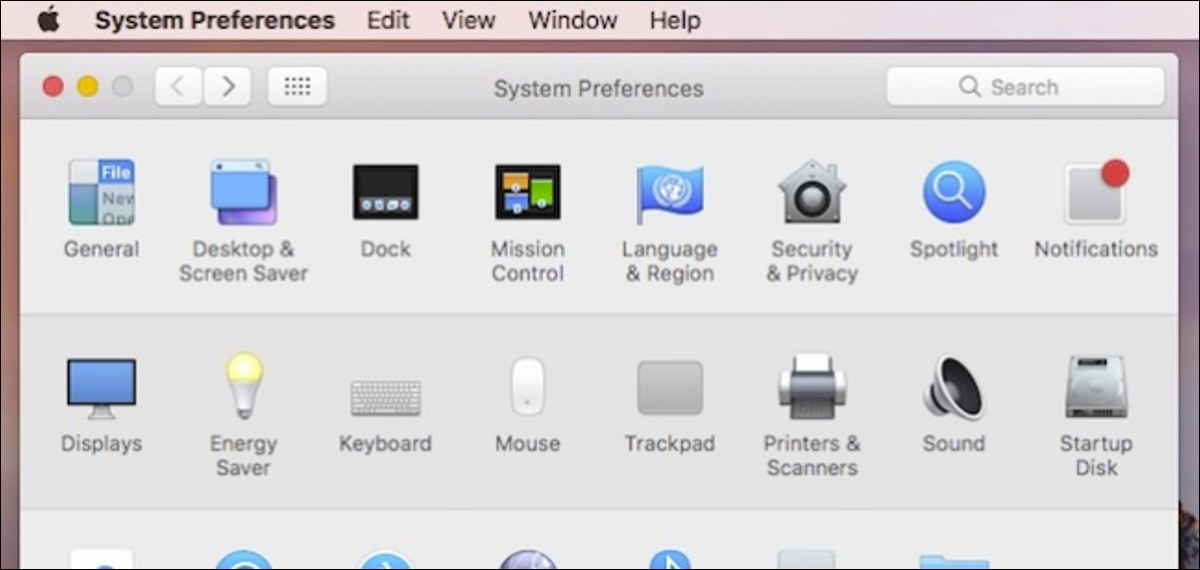
-
When the System Preferences menu opens, hit Printers & Scanners to discover the list of all connected Printers. If your Printer is on the list, it’s connected already.

-
Click on the Plus sign which is at the box’s bottom. Mac will start scanning for printers that are connected to the wireless Network.
-
Make a hit on your Printer and then tap on Add.
-
Click on Print. Have a preview of the Print and then click on Print to print your documents.
Conclusion
A proper connection between the Xerox Wireless Printer and the device is essential to print a document. Connect your Printer wirelessly and then add it to your device to initiate the printing function. You can go through the above guide for an easy procedure to connect the Printer on Windows and Mac devices.
Frequently Asked Questions
Question
How do I Connect My Xerox Printer to WPS?
The WPS method is one of the convenient ways to connect the printer to a wireless network. Here are some essentials steps that you need to execute.
- Firstly, power your printer Off and then On.
- Push the WPS button and hold it for approximately 2 seconds.
- Wait some time (2-3 minutes) until the blue WPS light stops and put an end to flashing.
- Next, wait again for around 2 minutes. Let the printer fetch a valid IP address.
- Verify the valid IP address obtained by printing a Configuration Report,
- Move to the red Stop button and press and hold it for 2-4 seconds for Configuration Report printing.
- Move next to Network Setup/TCP/IP settings. Enter the IP address into the web browser you're using. The successfully established connection with CentreWare Internet Services denotes that the IP address is accurate.
Question
How do I Connect My Phone to My Xerox Printer?
You can connect your phone to a Xerox printer using the Wi-Fi Direct feature. It required the Mopria Print Service App to be installed on your phone. Please note the printer doesn't need a wireless connection then.
- Look for Mopria Print Service App in the Google Play Store.
- Install the app and navigate to its settings.
- Click on Printing, then.
- Now, navigate to the notification area and click Mopria Print Service.
- Enable the app by clicking On.
- Exit Settings, and the mobile device will search for Wi-Fi Direct-enabled printers in the range.
Question
Why is My Xerox Printer Not Connecting to My Computer?
Is your personal Computer failing to make a connection with the printer? Reasons can be loose or defective cables or the printer not turned on. Apart from this, there can be outdated or corrupt drivers. Here are some checkouts and solutions that you can try in this situation.
- Restart your printer to solve connection issues.
- Check all the connected cables for damage.
- Update the printer's driver.
- Run the Printer Troubleshooter.
- Restart the Print Spooler Service.
Question
Why is My Xerox Printer Not Connecting to My Smartphone?
Sometimes, the printer can fail to print from a smartphone because of compatibility issues with the device's configuration. Or the printer is not connected properly to the Wi-Fi network. To troubleshoot the issue, go through some essential steps below.
- Turn off your printer and then turn it on.
- Next, disconnect the cable from the router and wait for approximately 10 seconds.
- Reconnect the cable and wait until the network connection establishes.
- Turn off your phone and then turn it on.