
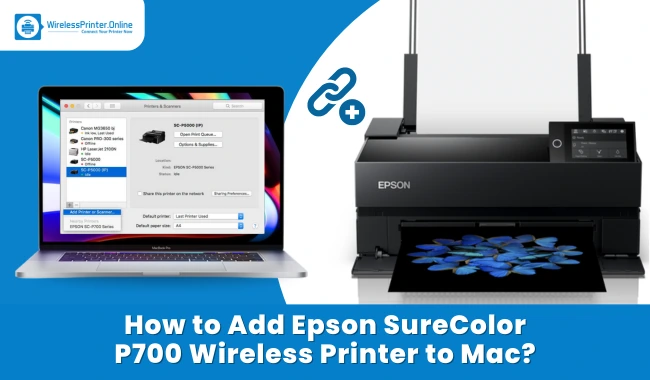
How to Add Epson SureColor P700 Wireless Printer to Mac?
March 28, 2025

If you have just purchased an Epson SureColor wireless printer and are excited to set it up with your Mac, you're in the right place. Printers can sometimes seem tricky to connect, especially when making them wireless. However, with the right steps, the process can be simple and quick.

This blog will guide you through each part of adding your Epson SureColor P700 printer to your Mac, ensuring you can print documents, photos, and more in no time. Wireless printing enables you to print anything from anywhere, simplifying your life.
So, whether you need to print school assignments, artwork, or important work documents, explore how to add your printer to your Mac smoothly. Follow along as we break down the steps to get your printer ready for print.
Step 1: Basic Requirements
Here are the steps you need to follow before learning how to add your Epson SureColor P700 printer to Mac:
● Make sure the printer is on and working: Check that your printer is turned on and functioning correctly. Look for any error lights and listen for sounds that show it's ready to print.
● Check your Wi-Fi network and password: Make sure your Wi-Fi is working. Be sure you are connected to the right network and that you have the correct password to connect to it.
● See if your printer can connect to Wi-Fi: Now, check if your specific printer model can connect to Wi-Fi. Not every printer has this ability, so look up the details for your model.
Step 2: Download & Install Printer Driver on Mac
Before printer setup, you need to download & install the printer driver on your Mac. A driver is important for enabling your computer to communicate with your printer. It sends the important commands telling your printer what to print or not.
- First, you need to turn on the printer.
- Then, open the Chrome browser on your PC.

- Go to the search bar and navigate to the official Epson website for the printer model.
- On the website, you need to scroll down until you find your operating system using the drop-down menu.
- Once you have found your operating system, hit the Go button.
- Again, scroll down and download the drivers and utilities combo package installer.
- Then, select the Download button and open the file.
- Double-click on the Epson logo and then hit the Open.
- After that, type in the Mac password and begin the driver installation. Click OK.
- Now, choose the Accept option and click on the Next button.
- Follow the on-screen instructions to fill the ink tanks and mark the checkbox, saying “I finished filling the ink tanks” option. Click on Next.
Step 3: Add Your Printer to Mac Using Wi-Fi
Before adding your Epson SureColor P700 printer to your Mac computer, you need to make sure that your Wi-Fi is providing you with a stable internet connection. We have described the simple steps below:
- Navigate to Connect via the Wireless Network (Wi-Fi) option, then hit Next.
- After that, go to the printer’s Control Panel and press the Wi-Fi button for at least five seconds.
- Then, click on the Next button.
- Select the Allow button if you are prompted to give access.
- Now wait and let your printer setup.
- On the next screen, ensure you choose the important software that you need and click the Install button.
- Click on the + icon button in the Printers & Scanners dialog box.
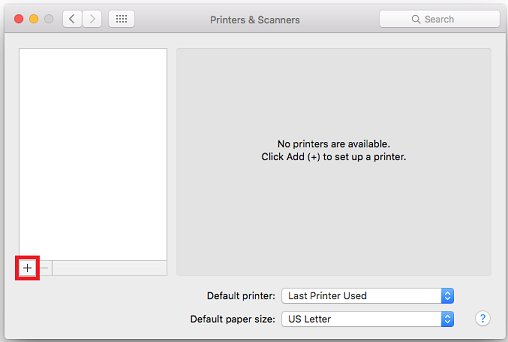
- Select your Wi-Fi listed with the "Bonjour Multifunction" mentioned in the kind column, then click the Add button.

- Run a Print test if you want, or click on Next.
- Click Next under Extended Service Plan, then click on the Finish & Register option.

Frequently Asked Questions
Question
How to Make My Epson Printer discoverable?
To make your printer easy to find, follow these steps.
- First, turn
on your printer.
- Make sure it
is connected to the same Wi-Fi network as your computer or phone.
- Go to the
printer's control panel and find the Wi-Fi setup option.
- Choose
"Wireless LAN Setup"
or "Wi-Fi Setup Wizard."
- Look for your Wi-Fi network and select it. If asked, enter your Wi-Fi password.
- Wait until the printer confirms it's connected, maybe by printing a test page.
Question
How to setup my Epson Printer on Mac?
To setup your printer on a Mac, follow these steps:
- Unbox your
printer and connect it to power.
- Then,
turn on the printer.
- Add the
printer to a wireless network through the printer's control panel.
- On your
Mac, select the Apple icon in
the top-left corner.
- Select
"System Preferences"
from the drop-down menu.
- Click on
"Printers & Scanners."
- Click the
"+" button to add a
printer.
- Wait for
your Mac to detect the printer on the network.
- Select
your printer from the list.
- Click
"Add" to install the
printer driver.
Question
How to get my Mac to recognize my Epson wireless printer?
To ensure your MacBook recognizes your printer, you need to follow the steps below:
- Check Printer Connection:
Ensure your printer is added to the same network as your computer.
- Power Cycle: Restart both
your Mac and printer.
- Update macOS: Make sure
your Mac has the latest software updates installed.
- Install Drivers: If the
printer does not show up, download and install the latest drivers from the
Epson website.
- Check Firewall: Ensure that
your firewall settings are not blocking the printer connection.
Enter your Comments Here: