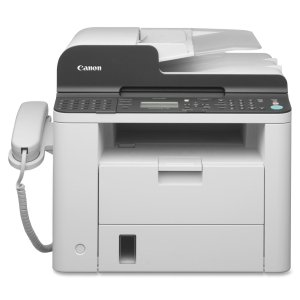
The Canon FAXPHONE L190 is a small laser fax printer designed for small offices and homes. This printer includes various fax capabilities and a fast laser engine. Providing two-sided faxing, copying, and printing wins your heart. As the printer is compact, it can fit any area effortlessly. So, get ready to set up your Canon FAXPHONE L190. We will cover each and every step in this blog to set up the FAXPHONE L190, including the driver's download. Let's begin the setup.

Step 1: Unbox the Canon FAXPHONE L190 Printer
The first step is to unbox your printer carefully and remove all the protective coverings from the package. Before installing your printer, check if all the accessories are included in the box. The common items are the power cord, telephone cable, handset, cradle, start guide, etc. If you see that anything is missing, contact the vendor or manufacturer.
Step 2: Install the Printer in a Safe Place
When you have uncovered the printer, it's time to install it in a safe place. Follow the given steps for this:
-
First, remove the plastic from the bag and place it at an installation site.
-
Take off the tapes.
-
Open the printer's feeder.
-
Remove the packaging and tape from the feeder.
-
Lastly, close the feeder.
Printer installation is a sensitive process. Hence, you should pay attention to the place where you are installing it. Ensure that the place is clean, dry, and near to a power outlet.
Step 3: Prepare the Printer to Use a Toner Cartridge
Once you have removed the packaging from your printer, remove the packaging from the toner cartridges which are already installed in the printer. Then, follow the given steps.
-
By holding the operation panel, raise the scanning platform.

-
Then, slightly hold the left front side of the toner cover and open it.
-
Now, move the sheet to the back and remove the packaging.
-
Take off the toner cartridges.
-
Take off the packaging material.
-
Shake the toner cartridge a little bit from side to side to let the toner cartridge evenly.
-
Then, take off all the protective materials and install the toner cartridge on a clean and flat surface.
-
Now, raise the tab and slowly take out the sealing tape.
-
After that, insert the toner cartridge into their respective fields.
-
At last, close the toner cover and put the scanning platform down.
That's how you can prepare the toner cartridges to use.
Step 4: Load the Paper
When you have installed the toner cartridges, you have to load the papers into the paper cassette. To load the paper, follow the steps below.
-
Open the paper tray cover at the front of your printer.
-
Then, extend the tray, and it will have an area to put the papers.

-
Now, take a stack of plain, letter-sized paper. Ensure that the edges of the papers are aligned with the tray and papers are not bent or curled.
-
Adjust the paper guides before inserting the paper.
-
Place the stack of paper into the tray with the print side facing down.
-
Ensure that the leading edge is aligned with the paper guides.
-
Next, push the paper tray into the wireless printer online until it clicks into place.
-
Lastly, close the paper tray cover.
Finally, your Canon FAXPHONE L190 printer is loaded with paper and ready to send and receive faxes.
Step 5: Connect the Handset
Once you have loaded the papers into the printer, you are required to install the handsets on the printer's left side. Also, follow the given steps.
-
First, take off the covers and put the pins in the holes into the cradle.
-
Then, push them until it stops.
-
Now, adjust the pins within the holes in your wireless printer online and connect the cradle to the Canon printer. Then, push the pins again.
-
Push the pins until they stop pushing.
-
Next, load the handset on your cradle.
-
After that, connect the printer's handset telephone line to the handset jet.
When you have connected the handset, it's time to connect the power cord.
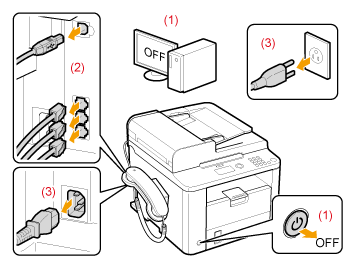
Step 6: Connect the Power Cord
You get the power cord with the printer's package. Then, follow the given steps.
-
First, ensure that your printer is switched off.
-
Then, insert one end of the power cord into the power socket and the other end into an AC power outlet.

This is how you can connect the power cord to your Canon printer.
Step 7: Download Printer Drivers and Software
This is the last step of setting up your Canon FAXPHONE L190. They have to be updated periodically to keep your printer running well and deliver the best performance. You can use the CD which you get with your printer or the official website of Canon to install the drivers.
On the official website, you will get the driver and software package with the latest version of drivers.
-
Go to Canon’s official website, and move to the Support section.
-
Then, find the product support page by using the search function. Otherwise, you can browse the website to locate the product support page for Canon FAXPHONE L190.
-
Now, select your operating system. On the product support page, find the section for drivers and software.

-
Select your operating system from the given options, such as Windows, macOS, etc.
-
Next, download the drivers and software. Then, find the appropriate drivers or software according to your operating system.
-
You can also locate drivers for printing or scanning functionality and the additional software that will improve your printer's capabilities.
-
And click the download link to download those drivers and software.
-
After downloading, go to your system's downloads folder and double-click on the downloaded file.
-
Let the installation run.
-
Finally, connect your Canon wireless printer online to your computer via USB or Wi-Fi.
That's it for downloading and installing the Canon drivers and software on your system. Now, the Canon FAXPHONE L190 setup ends, and you can use your printer to get prints, scans, or copies.


